Canon Rebel T5 Software Download Mac
Preparing to download images to the reckoner (software installation)
You tin use the any of the software on the "EOS DIGITAL Solution Deejay (CD-ROM)" that came with your camera to import images you accept taken to your computer.
Meet the 'Related information' section at the end of the folio for more information on the features of individual software applications.
IMPORTANT
- Never connect the camera to your computer before yous install the software. The software will non be installed correctly. Too, make sure to check the software system requirements confronting the specifications of your computer.
- If an older version of the software is installed, please follow the procedure beneath to update to the latest version. (The installation will overwrite the previous installation).
1. Turn the computer on.
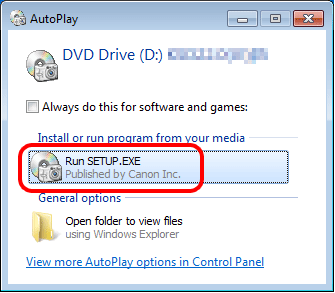
2. Insert the EOS DIGITAL Solution Disk (CD-ROM) into the calculator.
If the following window appears, click [Run SETUP.EXE].
If you lot are using a Macintosh computer, double-click the CD-ROM icon on the desktop, and and so double-click [Catechism EOS Digital Installer].
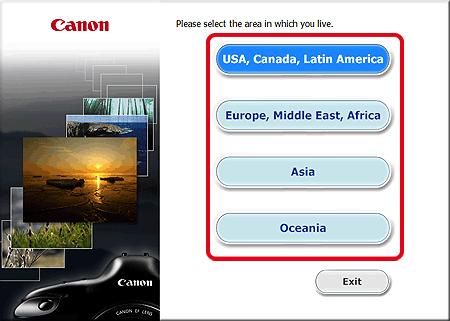
three. Select the area in which y'all live.
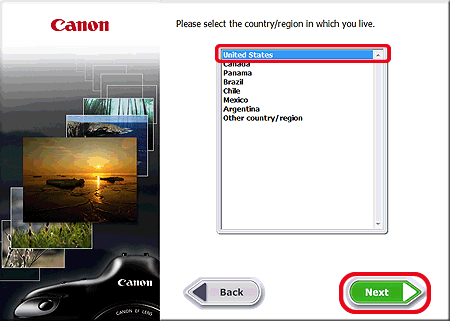
iv. Select the land where you alive, and then click [Next].
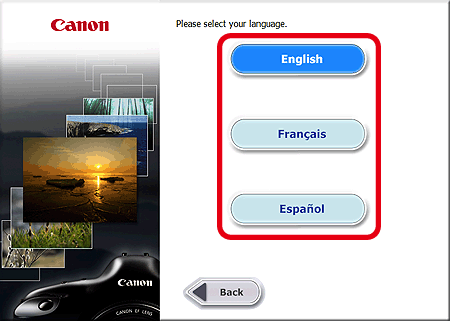
5. If a language setting screen appears, select the desired language from the options displayed.
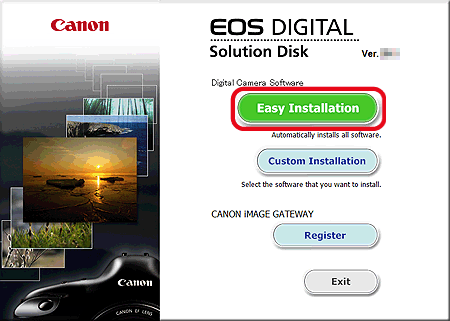
vi. Click [Piece of cake Installation] (to install all applications included on the Solution Disk).
For a Macintosh computer, click [Install].
NOTE
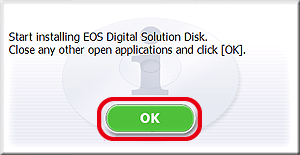
7. Shut any other applications, and so click [OK].
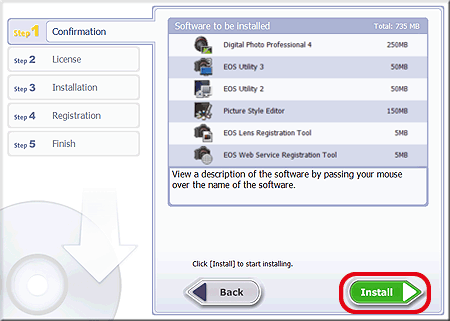
8. Click [Install].
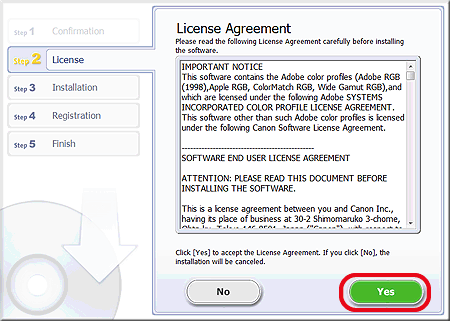
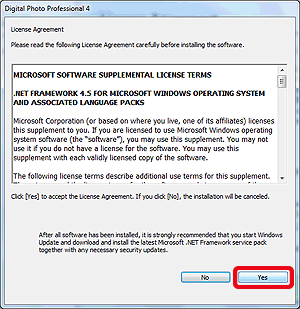
9. Click [Yes] to accept the License Agreement.
IMPORTANT
- On some models, the [User Account Control] screen may be displayed. In this case, please click [Yes].
- Installation of Microsoft .Net Framework four.5 is required to run the software in Windows seven. If Microsoft .NET Framework iv.5 is not installed on your computer, delight read the license agreement and if yous agree to the terms, click [Yep] to install Microsoft .NET Framework iv.5.
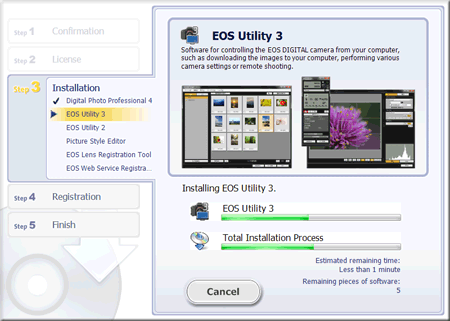
10. The post-obit window appears, and installation begins.
eleven. Click [Next].
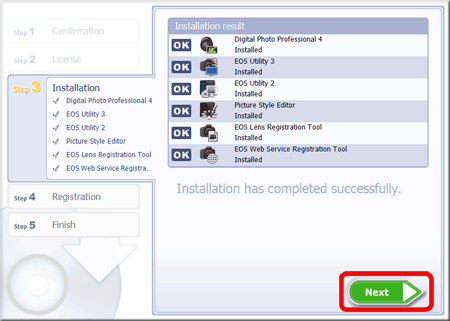
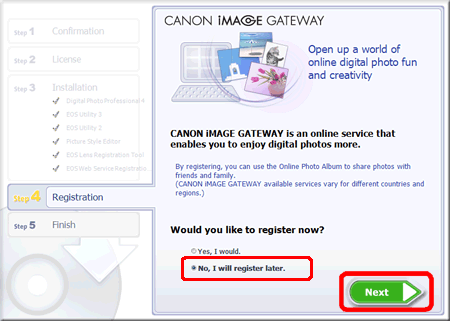
12. The post-obit screen appears.
In this example [No, I will register later] has been selected, and [Next] has been clicked.
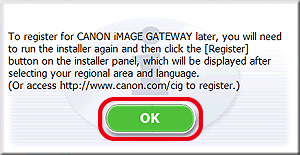
(To register in CANON iMAGE GATEWAY, select [Yeah, I would] and complete the registration process.
xiii. Click [OK].
14. Click [Finish].
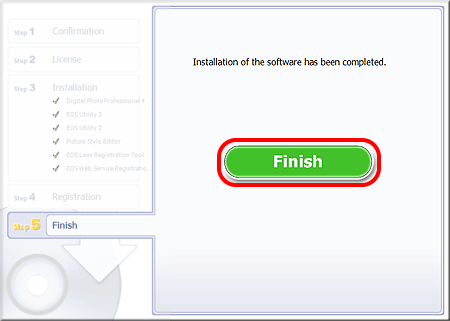
If a message appears prompting yous to restart the computer, click [Restart]. If you installed the software from a CD-ROM, please remove the CD subsequently the figurer restarts.
Annotation
Connect the photographic camera and the figurer
1. Confirm that the camera is not connected to the reckoner, and and so set the photographic camera's power to [ON].
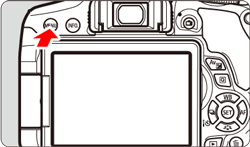
2. Press the [Carte] button to display the carte screen.
3. Change the camera'due south Motorcar power off settings.
3-1. Press the [  ], [
], [  ] keys to select the [
 ] tab.
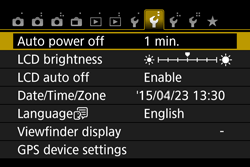
3-2. Press the [  ], [
], [  ] keys to select [Auto ability off], and then press [
  ].
].
iii-iii. Press the [ ], [ ] keys to select [Disable], then press [ ].
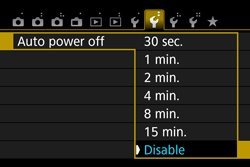
For more data on the Motorcar ability off feature, please refer to the cameras instruction transmission.
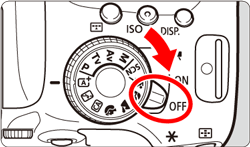
4. Press the [MENU] push to plough off the display on the LCD monitor, and and then set up the camera's power to [OFF].
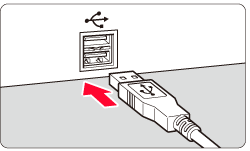
5. Plug the supplied interface cablevision into the USB port on your calculator.
- The location of the USB port may differ depending on the reckoner you lot use. For more than information, please refer to the computers instruction manual.
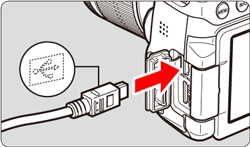
half dozen. Connect the cable to the cameras [DIGITAL] terminal with the cable plugs [  ] icon facing the front of the photographic camera.
NOTE
Downloading images to the estimator
1. Set the photographic camera'due south power switch to [ON].
ii. EOS Utility Ver. 3.ten starts.
If EOS Utility does non start automatically, click [Start] -> [All Programs] -> [Catechism Utilities] -> [EOS Utility] -> [EOS Utility].
NOTE
- Windows 8: Right-click on the [Start] screen and click on [All apps] displayed at the bottom right of the screen to brandish the [Apps] screen. Then, click [EOS Utility].
- Windows eight.ane: Click on the bottom left side of the [Start] screen to display the [Apps] screen, and then click [EOS Utility].
- Mac Bone X: Click the [EOS Utility] icon on the Dock.
IMPORTANT
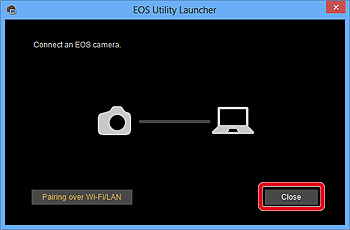
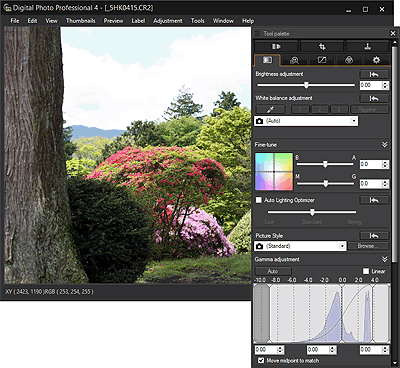
If you start EOS Utility before connecting the camera to the computer, the [EOS Utility Launcher] screen (shown in the example image below) will be displayed. In this case, please click [Close], and connect the camera to the computer after the window has closed.
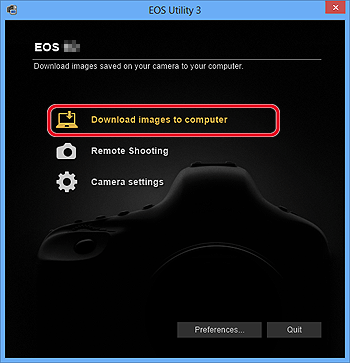
3. When the main window for EOS Utility appears, click [Download images to computer].
iv. To download all images saved to the memory card, click [Get-go automatic download] in the EOS Utility window.
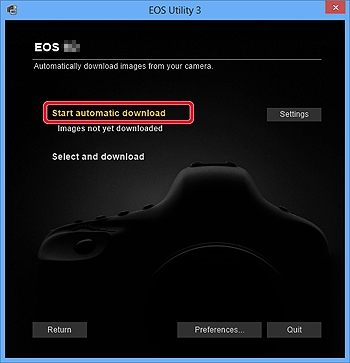
Past default, the downloaded images are sorted into folders by their shooting date, and are saved in the [My Pictures] folder on the computer. If you wish to alter the destination for the downloaded images, click [Preferences] and specify the settings in the dialog box.
NOTE
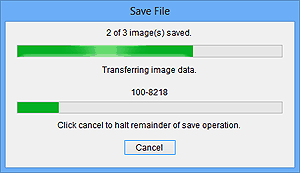
5. The images are downloaded to the computer.
half-dozen. When all the images have been downloaded, Digital Photo Professional starts and the downloaded images are displayed.
Confirming the images were downloaded to the computer
Images downloaded to your computer are displayed as a thumbnails listing in the master window.
By default, folders are created by shooting date. When y'all select the folder with the shooting date that you want to confirm ( ), a listing of the images recorded to this folder is displayed (
 ).
).
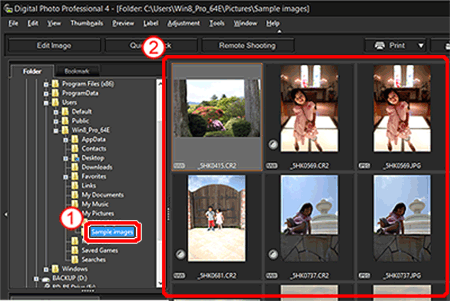
REFERENCE
- Images displayed with the [
] icon are picture show files and cannot be played back in Digital Photograph Professional.
- If the message [Insufficient retentivity.] appears, at that place are too many images in one binder. Decrease the number of images in one binder such every bit by dividing them into smaller folders.
You tin double-click an image to open the edit window and brandish the image at large size.
Canon Rebel T5 Software Download Mac
Posted by: haynesbeelty.blogspot.com
Post a Comment